How to get the data from LEGO API
Inside the journey, please choose
API BLOCK.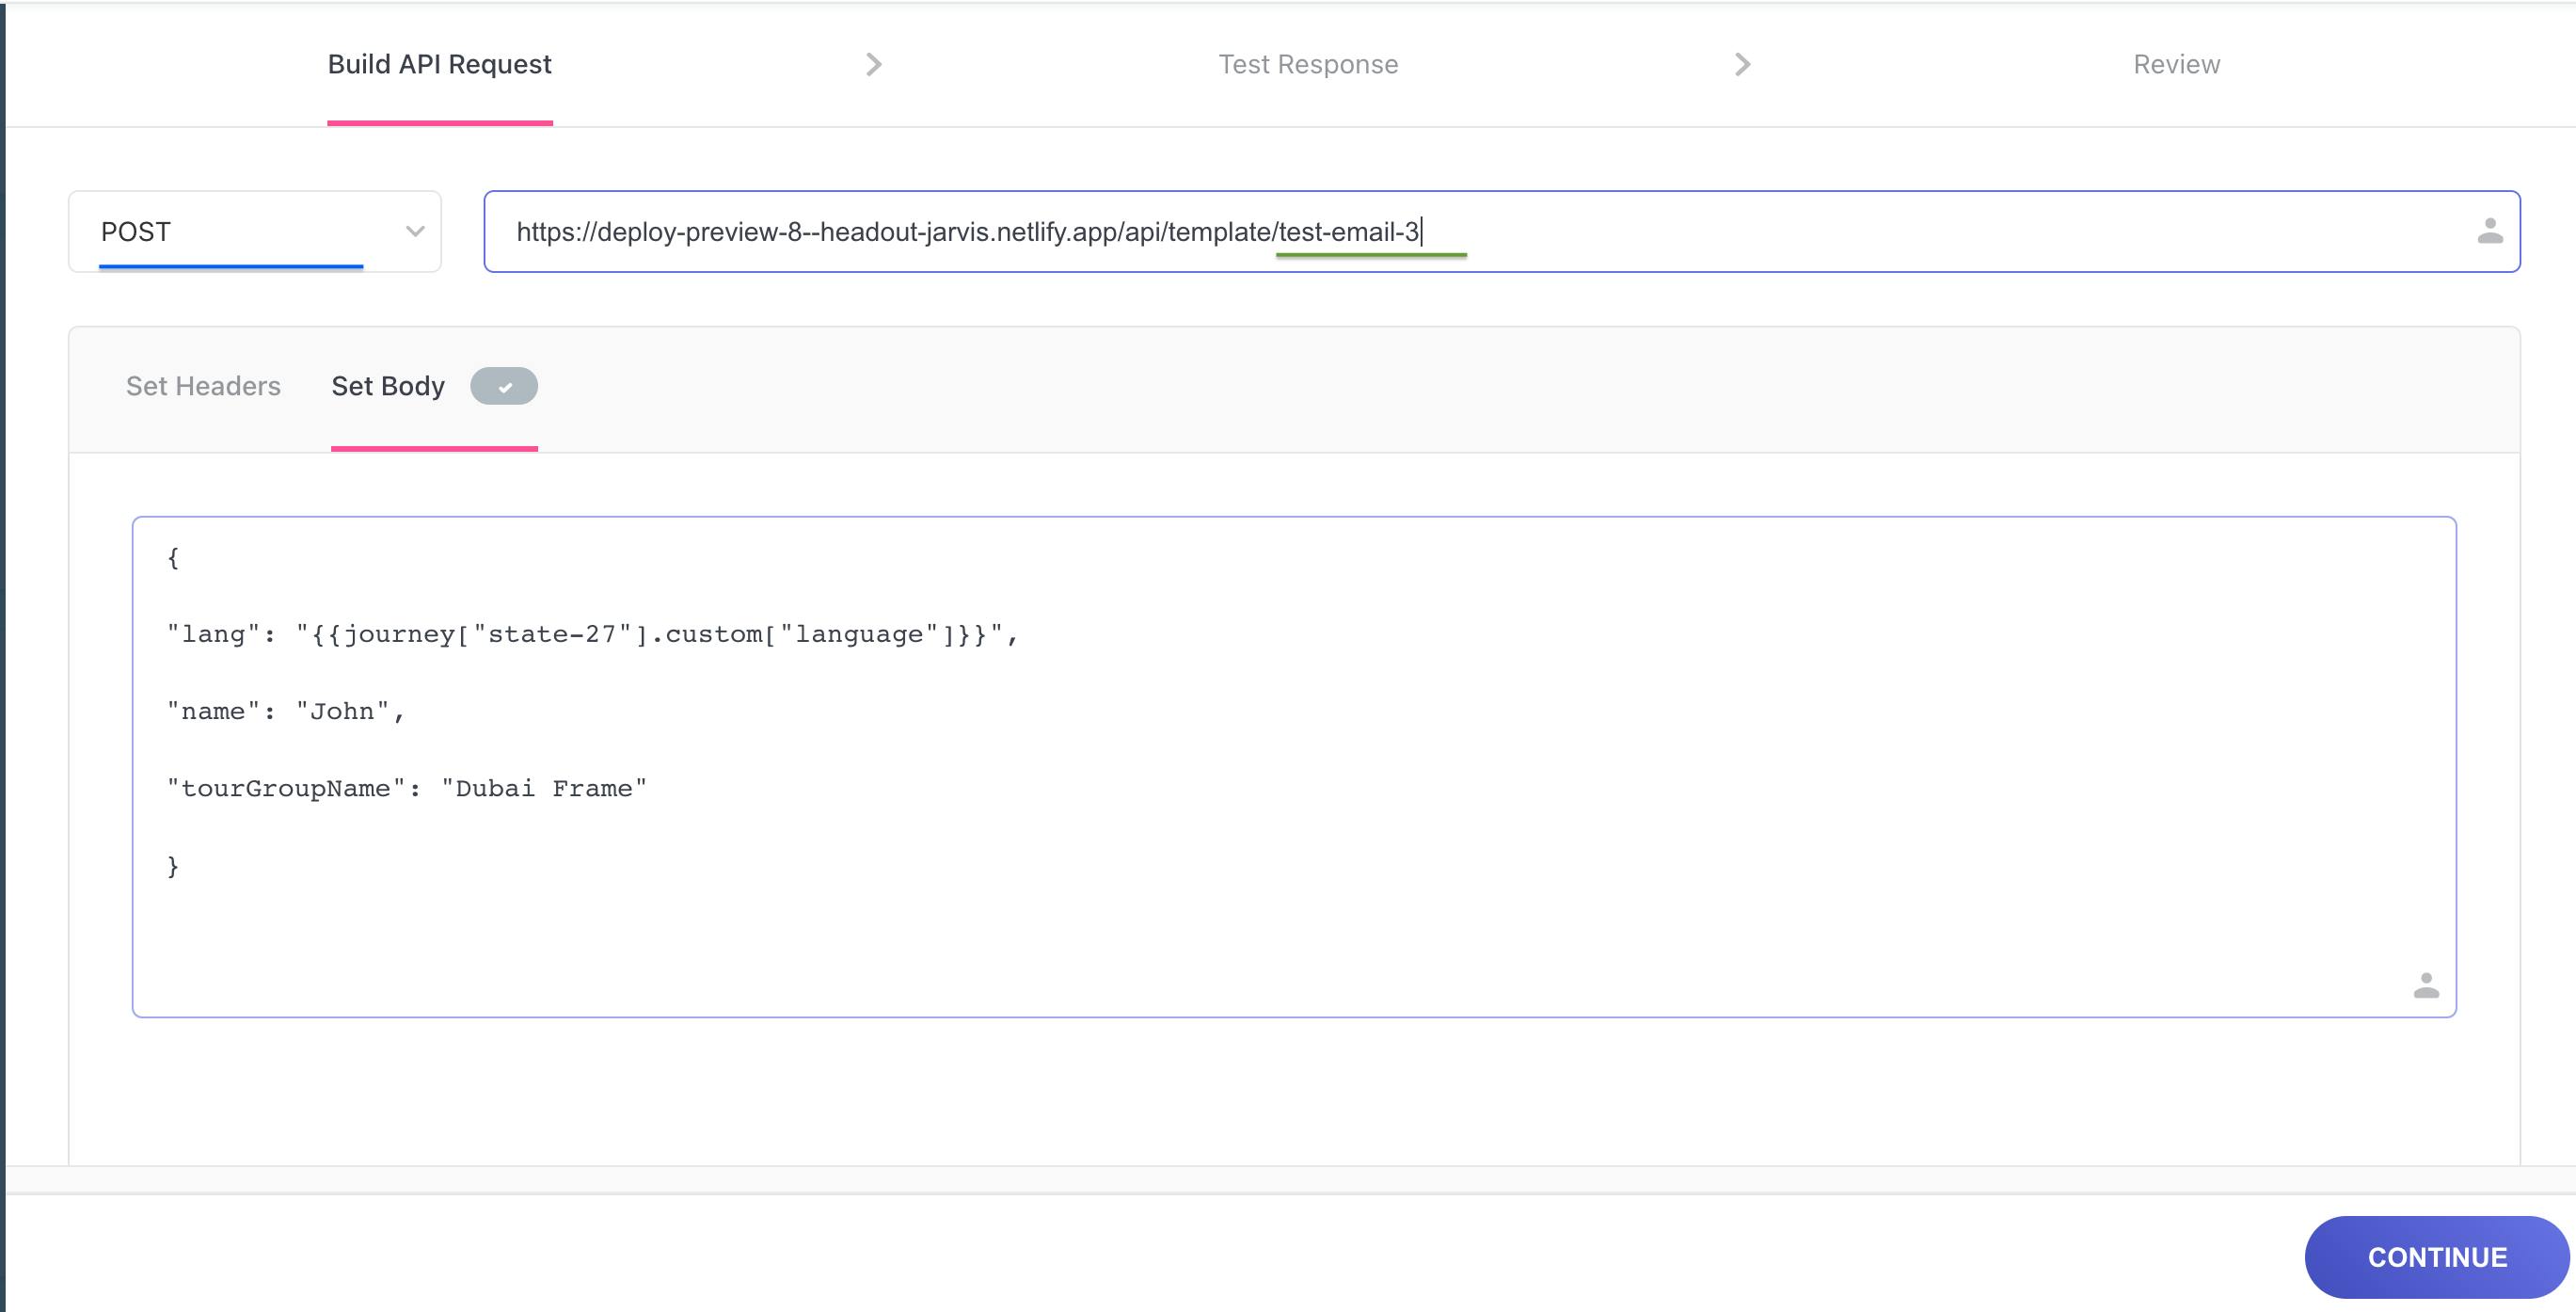
Click on the API Block. You should be able to see the above screen.
Build API Request
- Please ensure the
REQUEST TYPEisPOSTand notGETwhich is the default option(underlined in blue) - Please copy and paste the following link
https://lego.headout.com/api/template/<uid>in the URL bar. Replace<uid>(underlined in green) with the UID of the email. - Click on
Set Bodyoption and use the following format. Please ensure that you wrap each property and it's value indouble quotes
Default values:
{ "lang": "{{journey["state-27"].custom["language"]}}", "name": "John", "weTestResponse": "false", "userId": "{{user["system"]["cuid"]}}", }- In the above code,
langproperty is mandatory. nameandtourGroupNameproperty can be named anything. Please ensure that you use the same when using the{field}shortcode. Ex:{field key=tourGroupName fallback="tour"}.
Note:
Set Bodyoption is used to send WebEngage Data to the API and we can then show that data inside the email.- Once you are done with the above step, please click on
CONTINUE.
- Please ensure the
Test Response
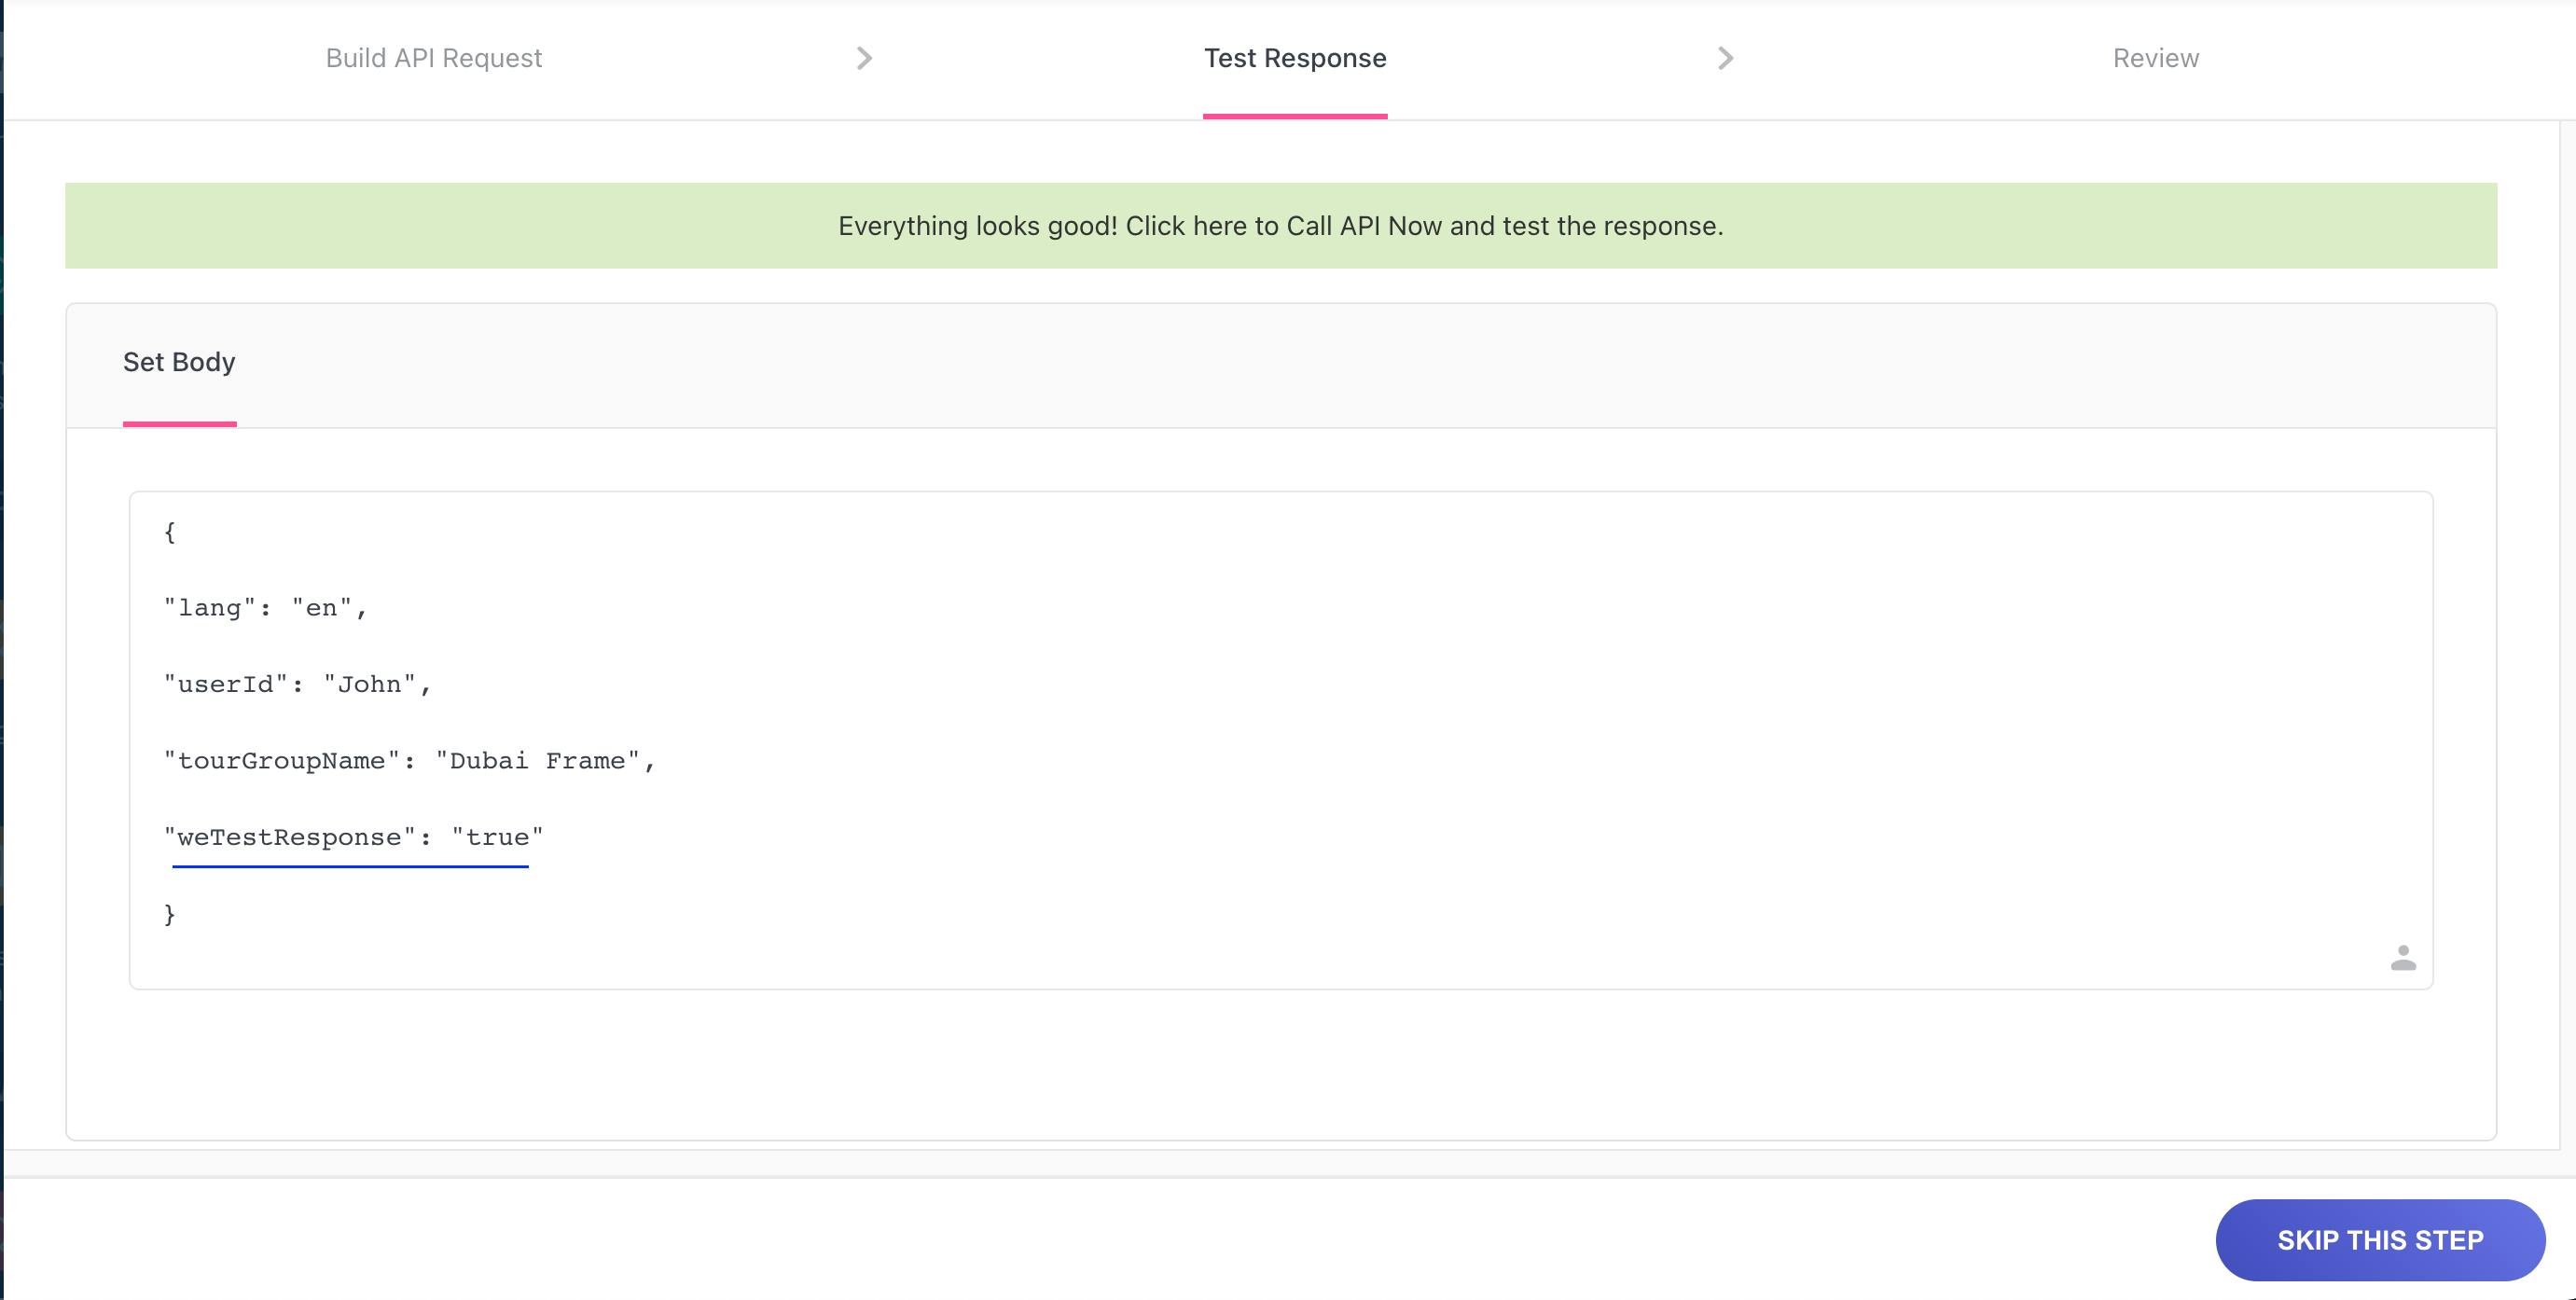
- You will see the above screen only if there is dynamic variable in the
body. - If you have dynamic value (webengage data), you can replace it with dummy data.
For
langyou can useenorenglish. - IMPORTANT: Please add
"weTestResponse": "true"at the end (underlined in blue). This is going to give us dummy data during test. WebEngage has limits and if the response exceeds certain number of characters or size we wouldn't be able to save the API block. - Once you have replaced all
the variables with dummy data and added
"weTestResponse": "true". Click on the text inside the green bar.
- You will see the above screen only if there is dynamic variable in the
Note: Please do not skip this step.
Review
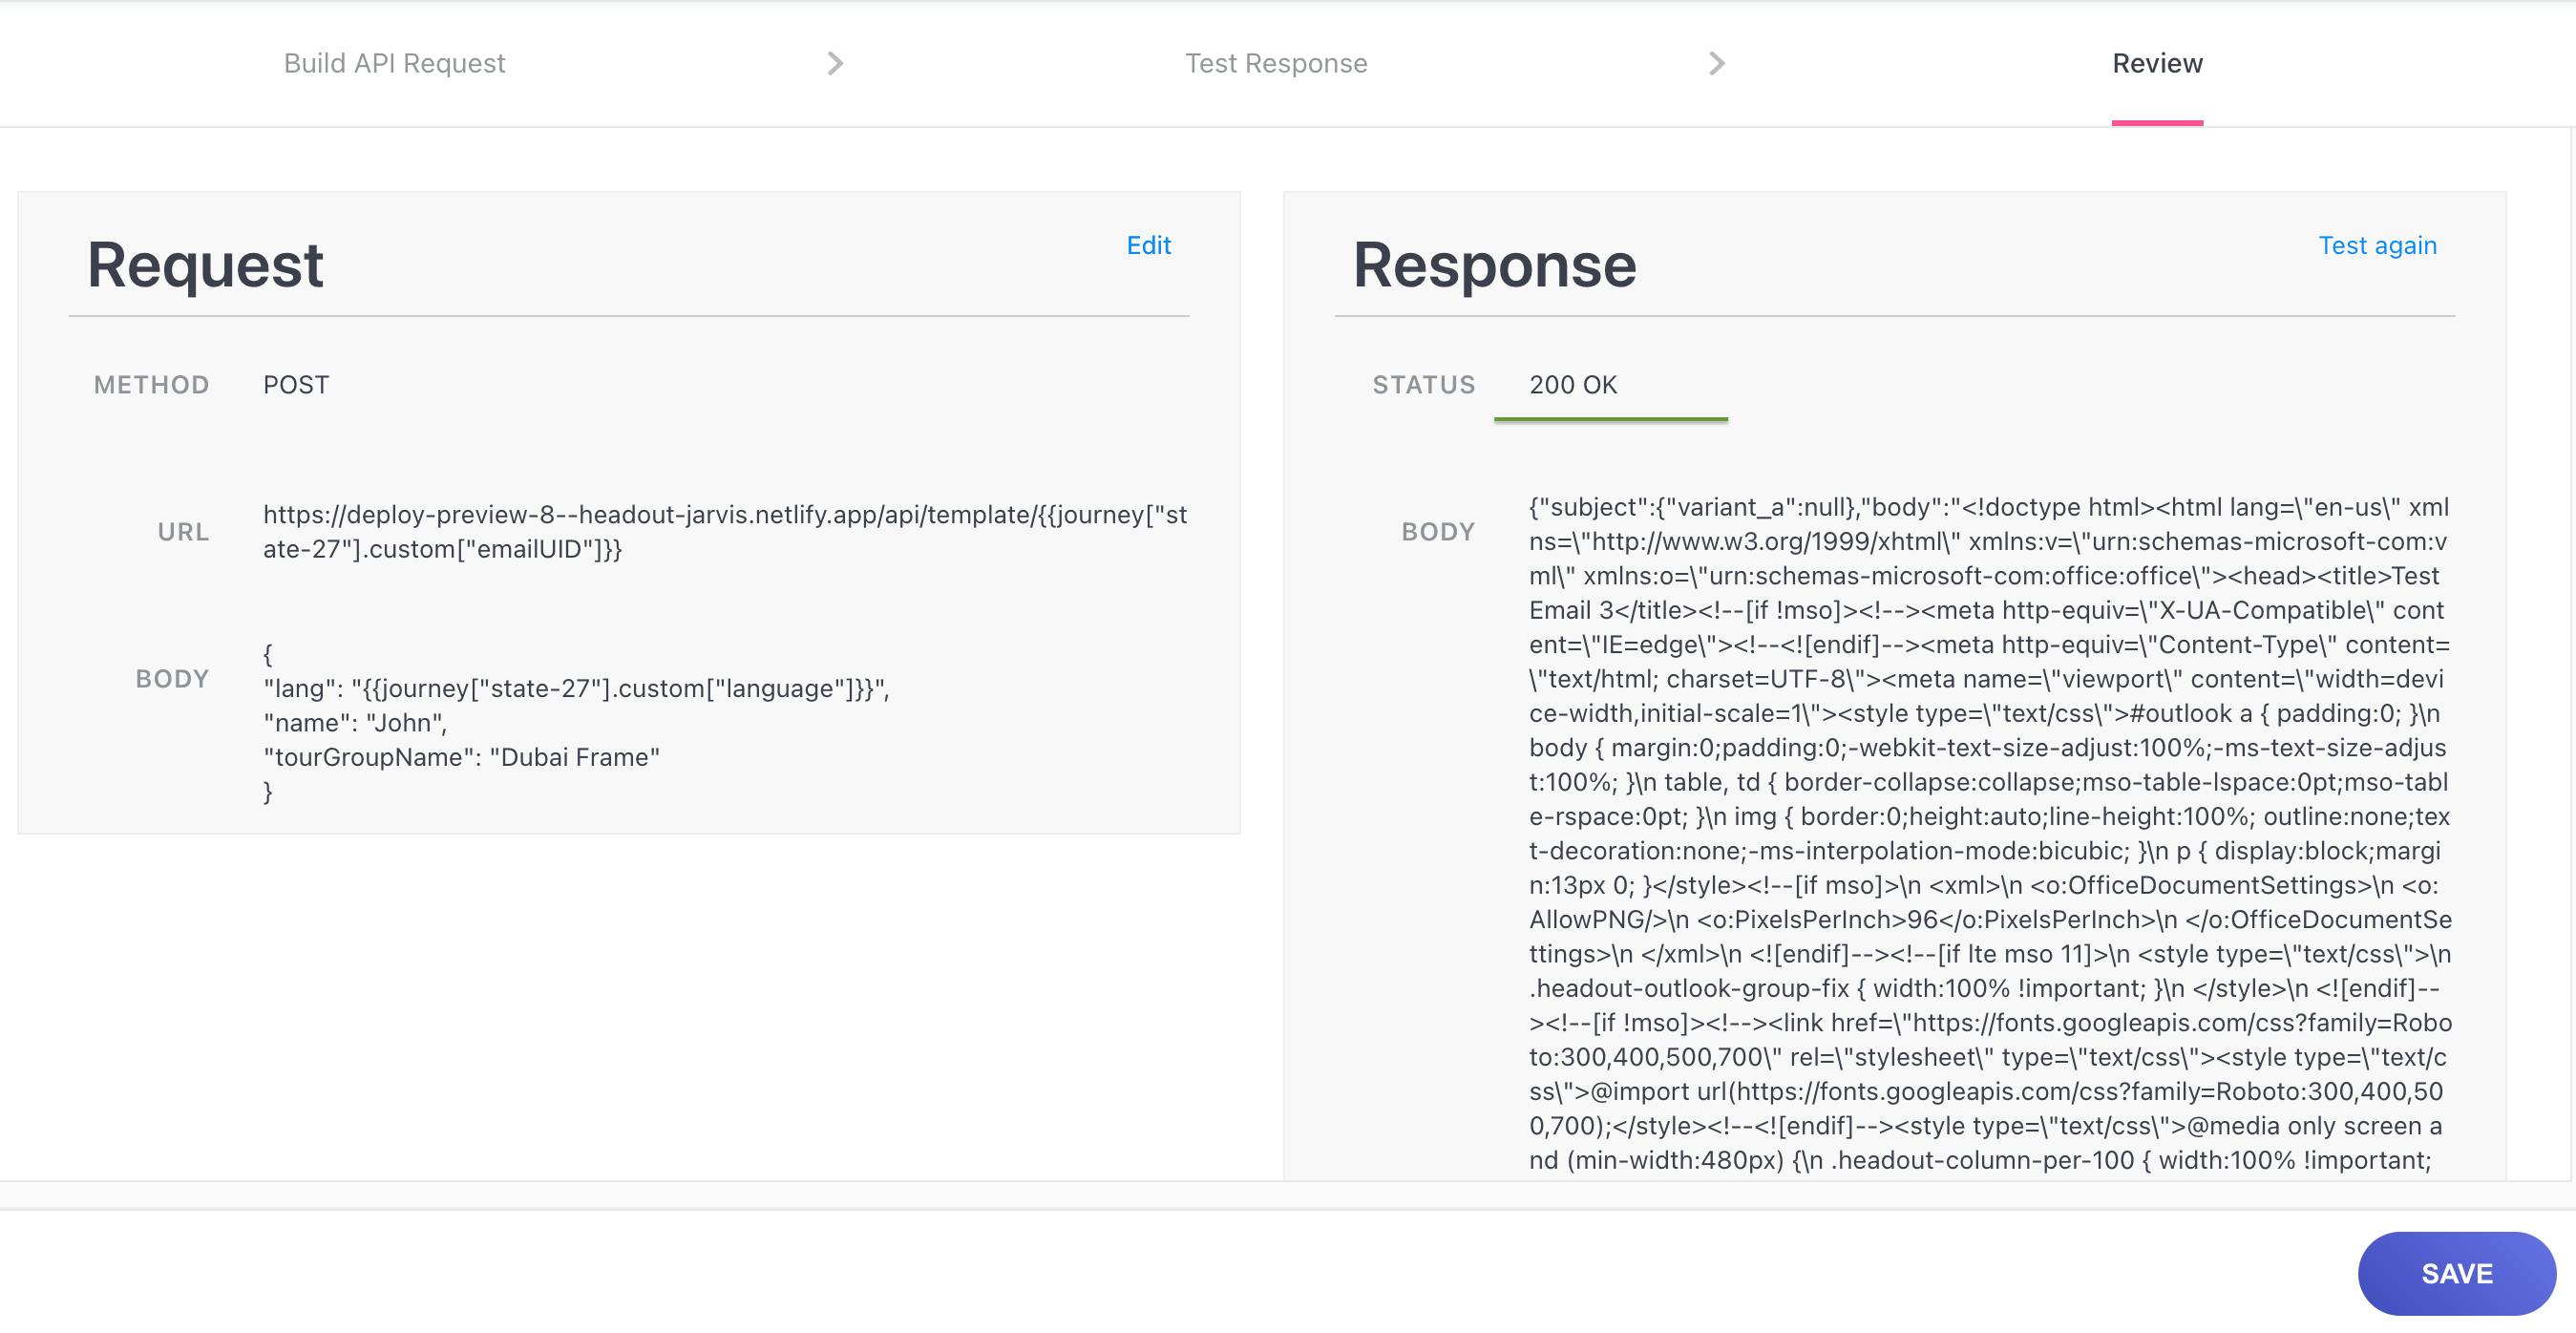
- If the test is successful, you should see the above response. Status will be 200
(underlined in green) - Click on
SAVE
Note: Sometimes if the response body is long, WebEngage wouldn't let you save. Close the API block and reopen, repeat step 1, skip step 2 and save on step 3.
- If the test is successful, you should see the above response. Status will be 200
Retrieving the data inside the email
- Click on the Email block, and go to
Messagetab. - Scroll down to the message section.
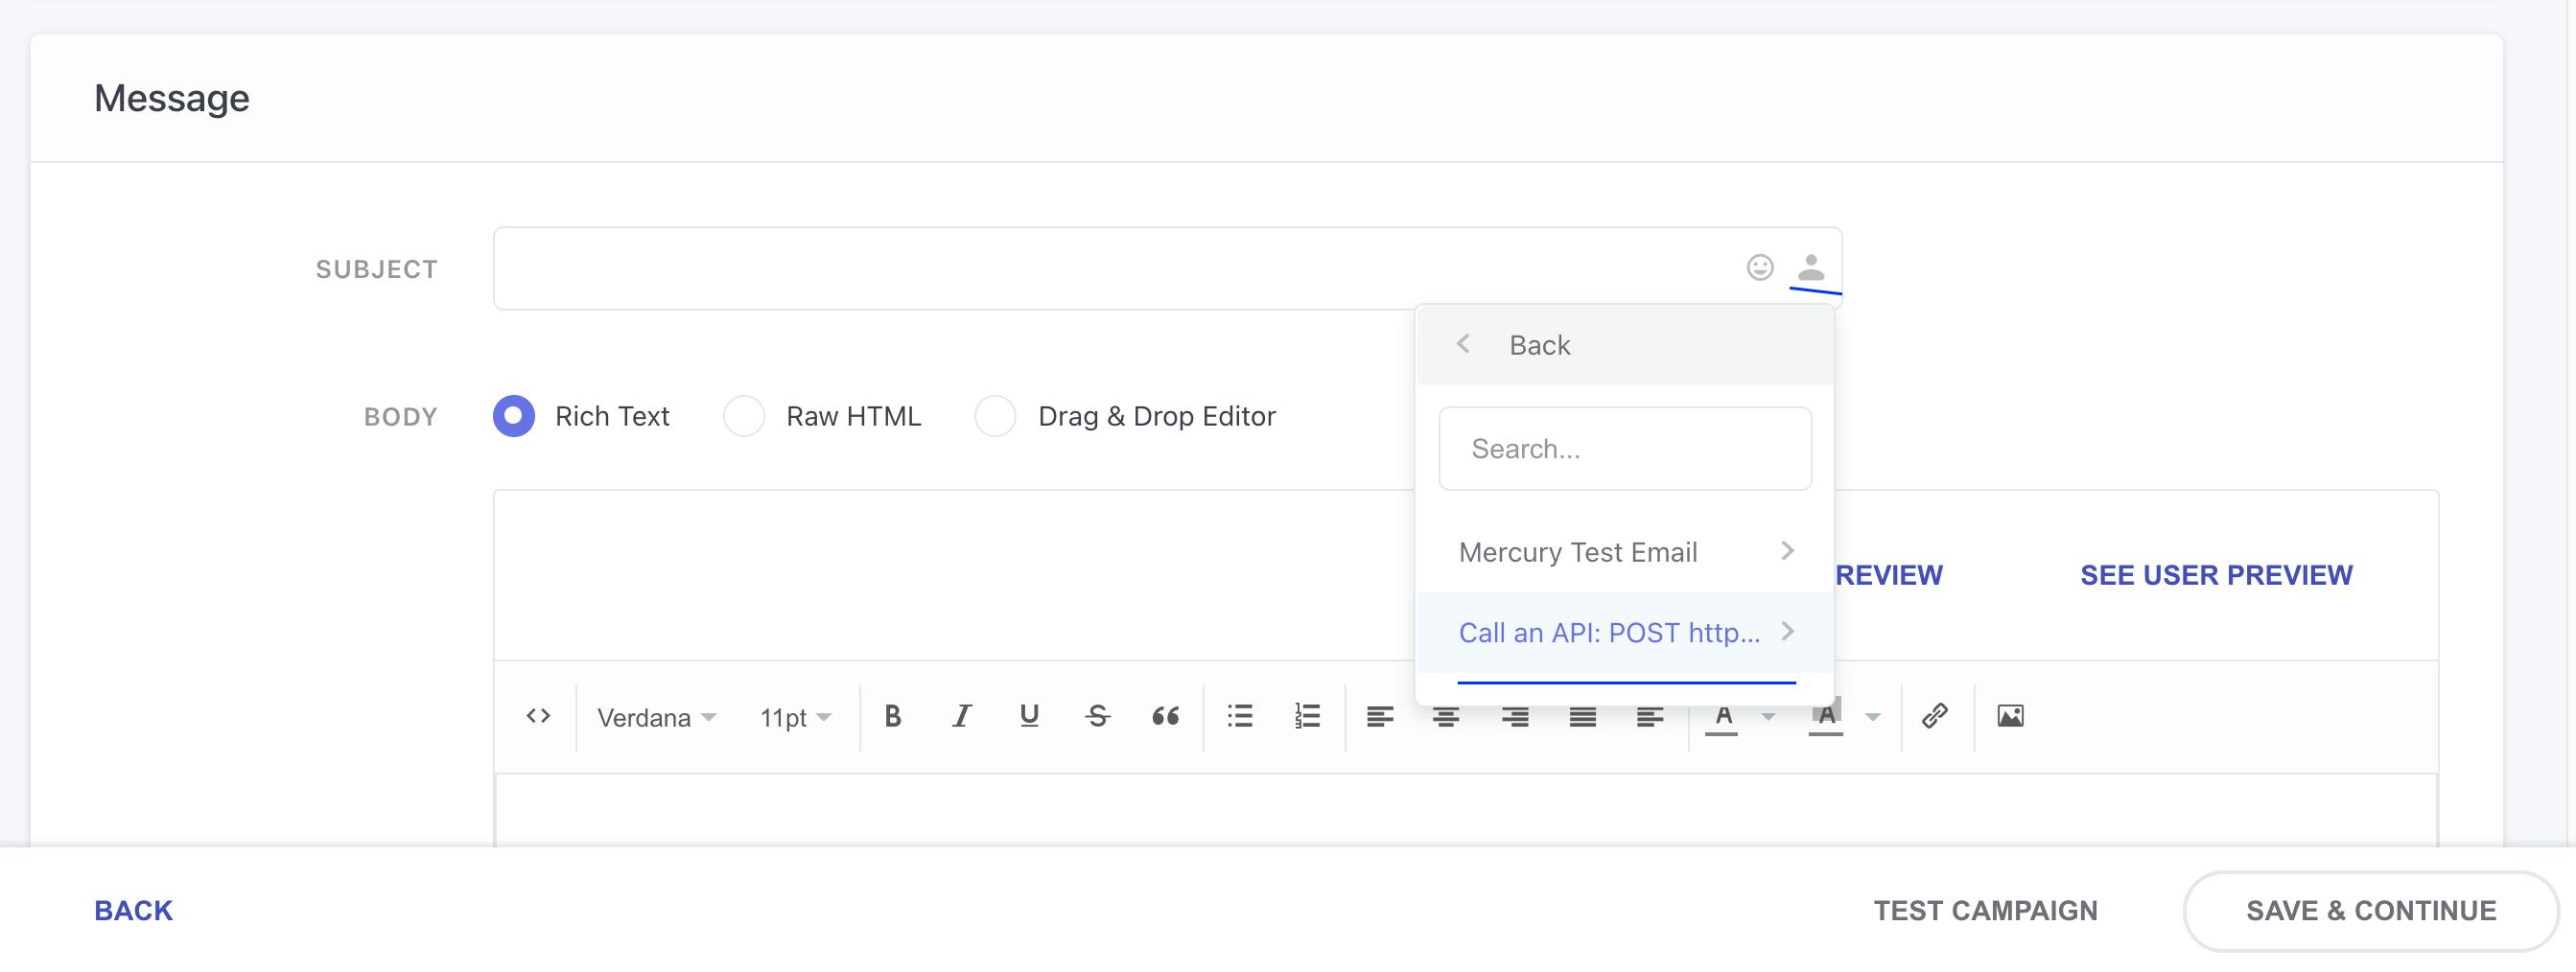
- Click on the
PermanentIdentityicon (^^ underlined in blue). - You would see 3 options:
- User Attributes
- Custom Events
- Journey
Select Journey and inside journey you should see the options () listed in the above image. Select
Call an API: POST http. Note: You may not see all the options as shown in the above image butCall an API: POSTshould be one among them.Subject
- After you select the above option you will two options. Select subject. By default, this how the webengage variable will look like
{{journey["state-76"].api_data["subject"]}}you will have to add.variant_a. Final, code will be{{journey["state-76"].api_data["subject"].variant_a}}
Note: Do not copy
subjectcode from the above line and paste it in the journey. Each journey will have it's own state value, hence it may not work.- To get other variant's, replace
.variant_awith.variant_band so on.
- After you select the above option you will two options. Select subject. By default, this how the webengage variable will look like
Body
- Go to the body section, select the options as
Raw HTML - Repeat steps 3-5
- Select Body
- Go to the body section, select the options as
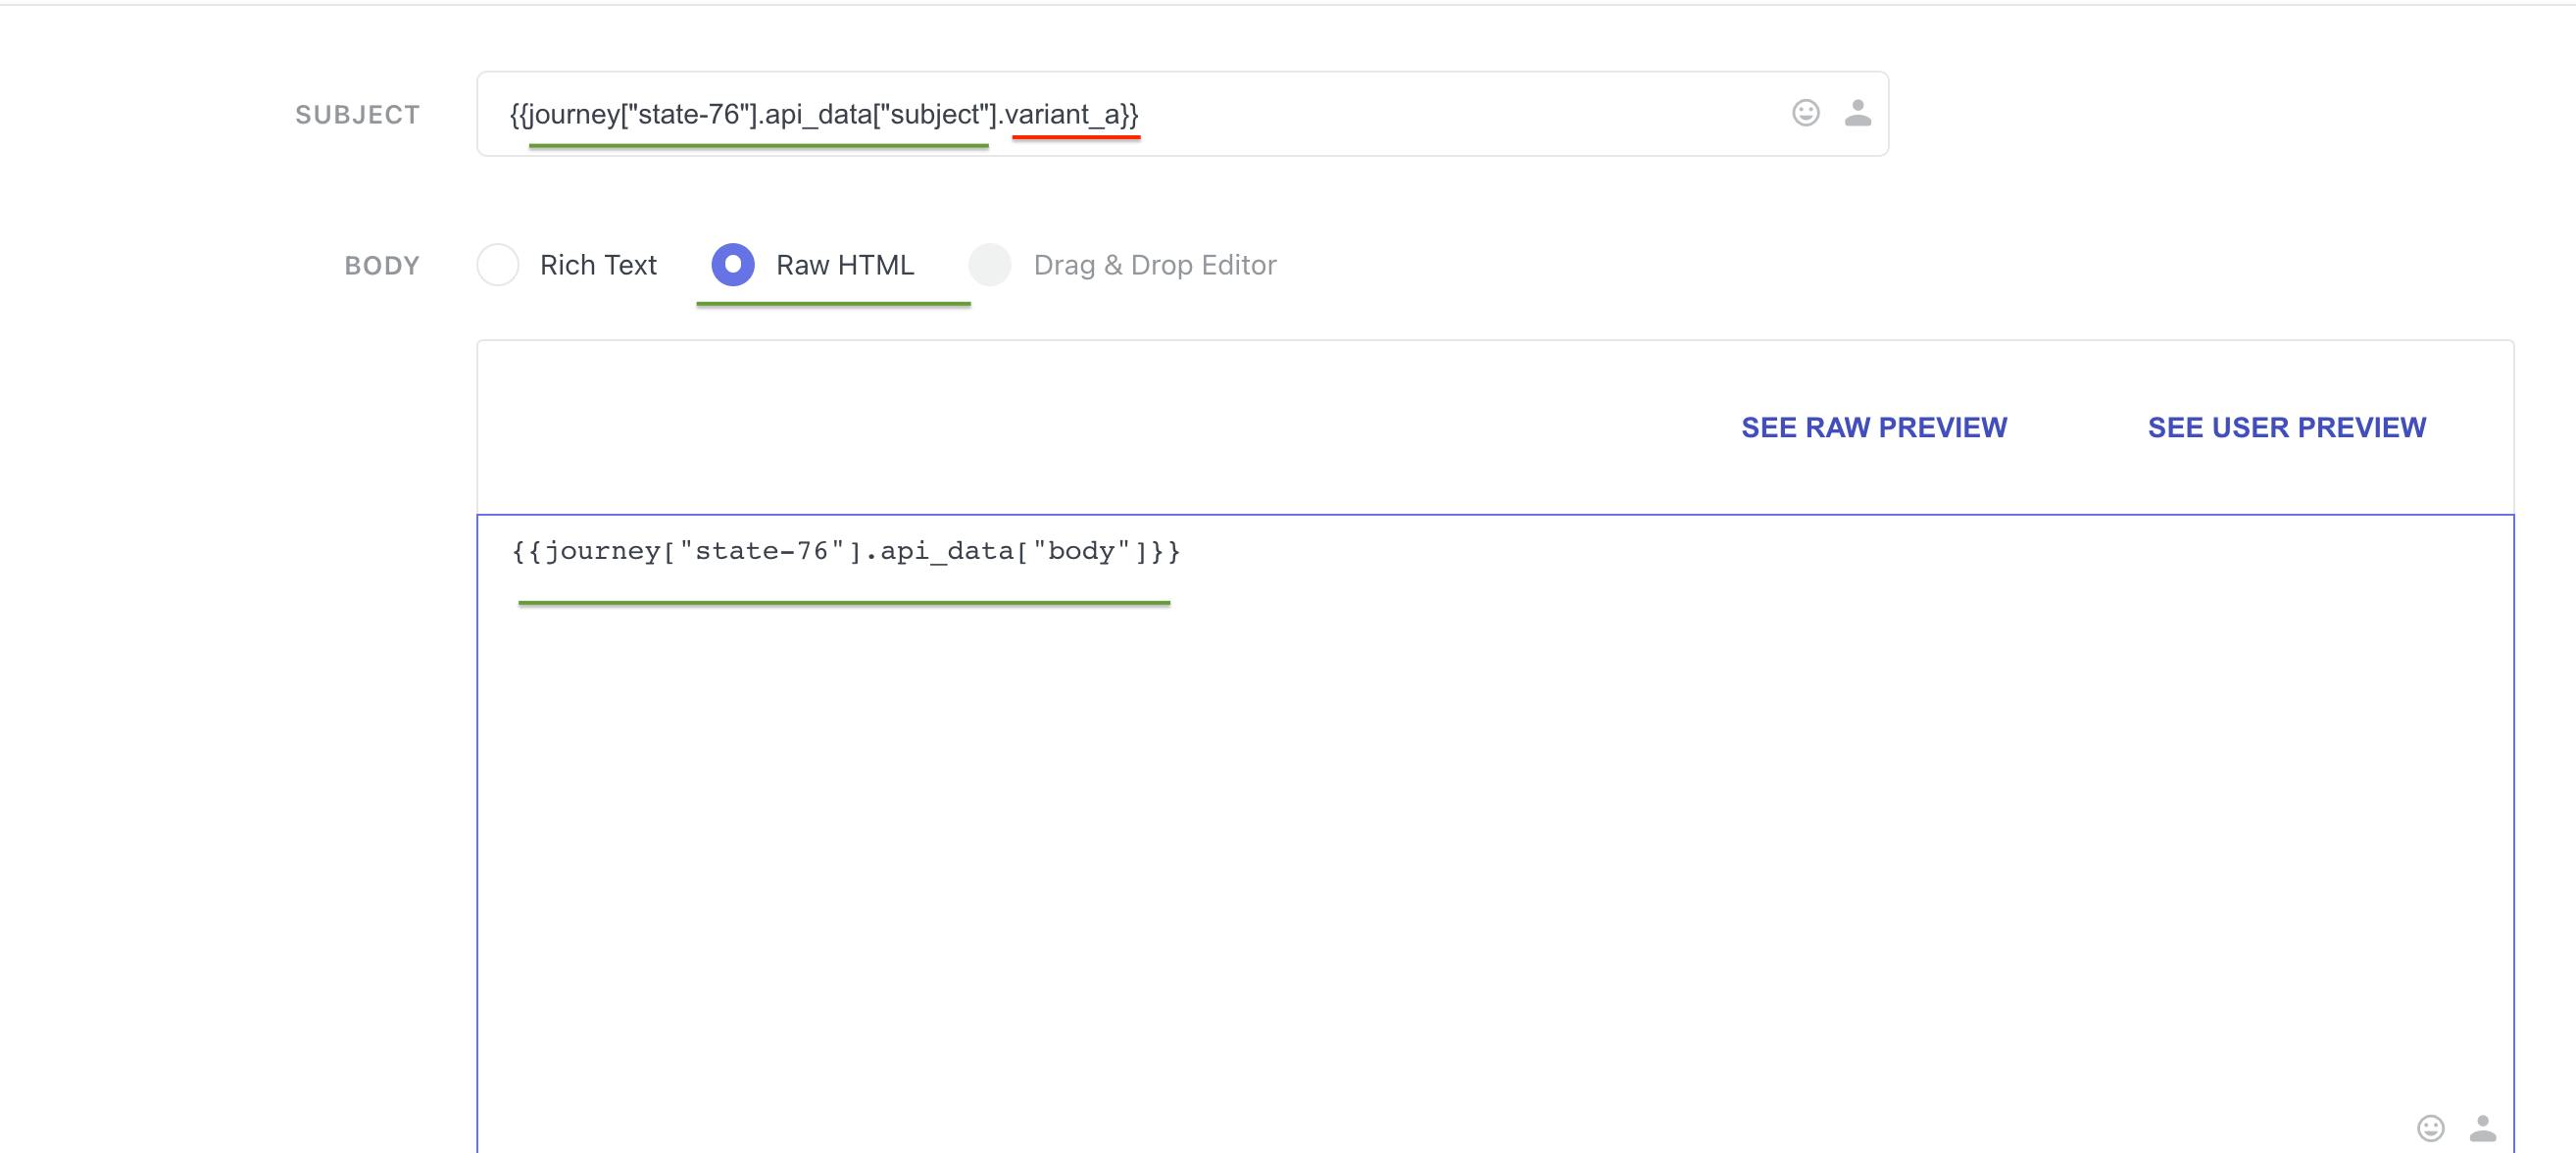
- Follow the webengage docs to complete the email setup.
FAQs
- How do I use this api for an email which is localised?
- The same email block will handle different languages. You do not have to create separate blocks for different languages.
- There might be edge cases, but we will cross that bridge when we get there.
How to connect Webengage API Failure Alert slack app with webengage.
We have created api endpoint that alerts us on slack (#webengage_api_failure_alerts) if there is a API failure. However, we need to set this up for every failure block.
Steps:
- On failure, hit
lego.headout.com/api/ - This is POST request, so please change the
REQUEST_TYPEtoPOST - Add post body, please use the below example ensure that you modify the values accordingly
- On success, we can
end the journey
Fields:
journeyName- (static & manual) WebEngage Journey namejourneyUrl- (static & manual) WebEngage journey urlapiUrl- (static & manual) Copy and the paste the entire url from API block that's above this blockuserEmail- (dynamic) Use the property from webengageapiComments- (static & manual) Some commentdisable- (optional) if set totrue, alerts will not be sent to slack
Note - All of the above fields are mandatory except disable
 {
    "journeyName": "Test",
    "journeyUrl": "www.test-headout.com",
    "apiUrl": "api.headout.com",
    "apiComments": "Some comment",
    "userEmail": "test@headout.com"
 }